Sign In
Upload
Manuals
Brands
Sony Manuals
Digital Camera
Cyber-shot DSC-F505
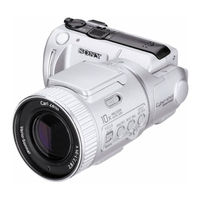
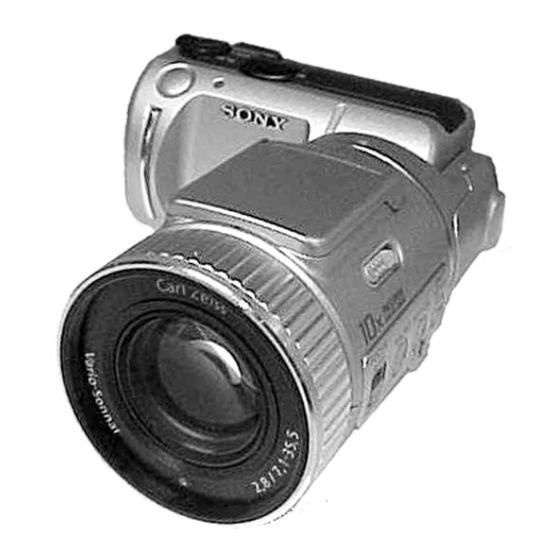
Sony Cyber-shot DSC-F505 Digital Camera Manuals
Manuals and User Guides for Sony Cyber-shot DSC-F505 Digital Camera. We have
3
Sony Cyber-shot DSC-F505 Digital Camera manuals available for free PDF download: Operating Instructions Manual, Service Manual
Sony Cyber-shot DSC-F505 Operating Instructions Manual (184 pages)
Sony Digital Still Camera Operating Instructions DSC-F505
Brand:
Sony
| Category:
Digital Camera
| Size: 2.51 MB
Table of Contents
English
5
Operating Instructions
1
Battery Pack
3
Table of Contents
5
Parts Identification
7
Preparation
10
1 Charging the Battery Pack
10
2 Installing the Battery Pack and "Memory Stick
12
3 Setting the Date and Time
14
Recording
16
Recording Still Images
16
Recording Moving Images
17
The Indicators During Recording
18
Using the Zoom Feature
19
Changing the Lens Orientation
19
Playing Back Playing Back Still Images
20
Playing Back Moving Images
21
The Indicators During Playback
22
Viewing Images Using a Personal Computer
23
Focusing Manually
32
Recording Images in Macro
32
Various Ways of Recording
32
Recording Images with the Flash
33
Adjusting Exposure (EXPOSURE)
34
Adjusting the White Balance
35
Enjoying Picture Effect
36
Using the PROGRAM AE Function
36
Using the Aperture Priority
37
Using the Shutter Priority
37
Using the Self-Timer
38
Using the Spot Light-Metering Mode
38
Selecting Image Quality (QUALITY)
39
Selecting Image Size
40
Selecting Recording Mode (REC MODE)
41
Playing Back Multiple Images at a Time (INDEX)
43
Various Ways of Playback
43
Enlarging a Part of the Image - Zoom and Trimming
44
Rotating Image (ROTATE)
45
Playing Back Images in a Continuous Loop (SLIDE SHOW)
46
Preventing Accidental Erasure (PROTECT)
47
In Index Mode
47
Deleting Images (DELETE)
48
Copying the Images in "Memory Stick
50
Formatting (Initializing) a "Memory Stick
51
Changing the Menu Setting
52
Setting the Mode of each Item
53
Using Image Data with
57
Using the House Current (Mains)
57
Watching Images on a TV Screen
57
Marking a Print Mark
58
On an Image
58
Printing the Recorded Images
58
Other Equipment
57
Additional Information
60
Precautions
60
Using Your Camera Abroad
61
Troubleshooting
62
Self-Diagnosis Display
64
Warning and Notice Messages
65
Specifications
66
Index
67
User's Guide for Picturegear 3.2 Lite
68
Before Use Program Features
70
Precautions for Use
72
About the Operating Environment
72
About Color Display Settings
72
How to Use this Manual
73
Installing Picturegear
74
Installing the Movie Support Library
76
Basic Operation
77
Starting the Program
77
Closing Picturegear
78
Viewing Slides
79
Displaying Sample Slides in the View Area
79
Display Slides Other than the Samples
80
Viewing a Slide Enlarged
81
Playing a Movie
81
Using with External Devices
82
Using a Video Camera
82
Connections and Settings
82
Using the First Time
84
Storing Images
84
Using a Digital Still Camera
85
Connections and Settings
85
Using the First Time
86
Storing Images
87
Using a "Memory Stick" Serial Port Adaptor (for Handycams)
88
Connections and Settings
88
Using the First Time
89
Storing Images
90
Storing Images from External Devices
91
Miscellaneous
92
How to Uninstall Picturegear
92
In Case of Trouble
93
Español
95
Guía del Usuario para
95
Identificación de Los Componentes
98
Preparativos
101
Carga de la Batería
101
Instalación de la Batería y "Memory Stick
103
Ajuste de la Fecha y la Hora
105
Grabación
107
Grabación de IMágenes Fijas
107
Grabación de IMágenes en Movimiento
108
Reproducción Reproducción de IMágenes Fijas
111
Reproducción de IMágenes en Movimiento
112
Visualización de IMágenes con un Ordenador Personal
114
Distintas Formas de Grabación
123
Enfoque Manual
123
Grabación de IMágenes en Modo Macro
123
Grabación de IMágenes con el Flash
124
Ajuste de la Exposición (EXPOSURE)
125
Pantalla Lcd
125
Ajuste del Balance del Blanco
126
Función de Efecto de Imagen
127
Utilización de la Función de PROGRAM AE
127
Uso del Temporizador
129
Utilización del Modo de Medición de Foco
129
Selección de la Calidad de Imagen (QUALITY)
130
Selección del Tamaño de la Imagen
131
Selección del Modo de Grabación (REC MODE)
132
Distintas Formas de Reproducción
134
Reproducción de Varias IMágenes a la Vez (INDEX)
134
Ampliación de una Parte de la Imagen- Zoom y Recorte
135
Rotación de Imagen (ROTATE)
136
Reproducción de IMágenes en Bucle Continuo (SLIDE SHOW)
137
Prevención contra Borrados Accidentales (PROTECT)
138
Eliminación de IMágenes (DELETE)
139
Copia de IMágenes en un "Memory Stick
141
Formateo (Inicialización) de un "Memory Stick
142
Cambio de un Ajuste del Menú
143
Ajuste del Modo de cada Opción
144
Uso de Datos de Imagen
148
Visualización de IMágenes en la Pantalla de un TV
148
Impresión de las IMágenes Grabadas
149
Inserción de una Marca de Impresión en una Imagen
149
Precauciones
151
Uso de la Cámara en el Extranjero
152
Solución de Problemas
153
Indicación de Autodiagnóstico
155
Mensajes de Advertencia y Aviso
156
Especificaciones
157
Índice Alfabético
158
Con Otro Equipo
148
Uso de Corriente Doméstica
148
Guía del Usuario para Picturegear 3.2 Lite
159
Antes de la Utilización
161
Funciones del Programa
161
Precauciones para la Utilización
163
Forma de Utilizar Este Manual
164
Instalación de Picturegear
165
Operación Básica
168
Inicio del Programa
168
Cierre de Picturegear
169
Contemplación de Vistas Fijas
170
Reproducción de una Película
172
Utilización con Dispositivos
173
Utilización de una Videocámara
173
Utilización de una Cámara Digital
176
Información Adicional
183
Forma de Desinstalar Picturegear
183
En Caso de Problemas
184
Advertisement
Sony Cyber-shot DSC-F505 Service Manual (129 pages)
Brand:
Sony
| Category:
Digital Camera
| Size: 5.43 MB
Table of Contents
Table of Contents
3
Service Note
5
General
7
Disassembly
22
Attachiment of CPC-9 Jig
22
Removal of Rear Cabinet Block
23
Removal of Zoom Lens Block
23
Removal of Cabinet (LT) Block
24
Removal of Lens Block
24
Service Positionn-1 (Lens Block Area : CD-236, LD-98, PS-427 and SY-56 Boards)
24
Removal of LCD Panel Block and Control Switch Block (FK)
25
Service Positionn-2
25
Control Switch Block (FK)
25
Removal of HI-70, DD-131 Boards and Battery Holder Block
26
Removal of Upper Cabinet Block and Flash Unit (MC)
26
Service Positionn-3 (HI-70 and DD-131 Boards)
27
Removal of Front Cabinet Assembly
27
Removal and Attaciment of FP-133 Flexible Board
28
To Fold the New FP-133 Flexible Board
28
Removal of Crystal Indication Module
29
Removal of Flash Unit (ST)
29
Circuit Boards Location
30
Flexible Boards and Control Switch Block Location
30
Block Diagrams
31
Overall Block Diagram
31
Camera Block Diagram
32
Camera/Memory Stick Block Diagram
33
Lens Drive Block Diagram
34
Mode Control Block Diagram
35
Lcd/Audio Block Diagram
36
Power Block Diagram (1)
37
Power Block Diagram (2)
37
Power Block Diagram (2)
38
Printed Wiring Boards and Schematic Diagrams
39
Frame Schematic Diagram (1)
40
Frame Schematic Diagram (2)
41
Printed Wiring Boards and Schematic Diagram
42
CCD Imager, Camera
42
Camera Dsp, Memory Control
44
Camera Dsp
46
Memory Control
47
Sh Dsp, Memory, Serial I/O, Connector, Digital I/O
48
Sh Dsp (Sh (1/2) )
50
Digital I/O (Sh (2/2) )
51
Memory (MM (1/2) )
52
Serial I/O (MM (2/2) )
53
Connector
54
Usb
55
Mf Unit
55
CF/PW (Control Switch Block)
55
Lcd Drive
58
Timing Generator
59
Video
60
Audio
61
Hi Control (1/2
62
Hi Control (2/2
63
Waveforms
67
Printed Parts Location
68
Adjustments
69
Before Starting Adjustment
69
Adjusting Items When Replacing Main Parts and Boards
70
Adjustments
71
Preparations before Adjustment
71
List of Service Tools
71
Preparations
72
Discharging of the Strobe Power Supply
72
Precaution
74
Setting the Switch
74
Order of Adjustments
74
Subjects
74
Preparing the Flash Adjustment Box
75
Initialization of B, D, E, F
76
Initialization of D
76
Initializing the D
76
Modification of D
76
Initializing the B, E, F
79
Modification of B, E, F
79
E Page Table
82
B Page Table
84
Page Table
87
Video System Adjustments
89
Video Sync Level Adjustment
89
(Control Switch Block (FK) )
89
Video Burst Level Adjustment
89
Video y Level Check
89
Camera System Adjustments
90
HALL Adjustment
90
Flange Back Adjustment (Using Minipattern Box)
91
Flange Back Adjustment
91
(Using Flange Back Adjustment Chart)
92
Flange Back Check
92
Picture Frame Setting
93
F No. Standard Data Input
93
Mechanical Shutter Adjustment
93
AGC Standard Gain and Max Gain Adjustment
94
Light Level Adjustment and ND SHUTTER CHECK
94
Auto White Balance Standard Data Input
95
Auto White Balance ND Filter Compensation Adjustment
95
Auto White Balance Adjustment
96
Color Reproduction Adjustment
97
Color Reproduction Adjustment (Without ND Filter)
97
Color Reproduction Adjustment (with ND Filter)
97
Color Reproduction Check
98
White Balance Check
99
Strobe White Balance Adjustment
99
Strobe Light Level and White Balance Check
100
CCD Black Defect Compensation
100
CCD Black Defect Compensation Check
101
CCD White Defect Compensation
102
CCD White Defect Compensation Check
102
Lcd System Adjustment
103
LCD Initial Data Input
103
VCO Adjustment (Control Switch Block (FK) )
104
D Range Adjustment (Control Switch Block (FK) )
104
Bright Adjustment (Control Switch Block (FK) )
105
Contrast Adjustment (Control Switch Block (FK) )
105
Color Adjustment (Control Switch Block (FK) )
106
V-COM Level Adjustment (Control Switch Block (FK) )
106
V-COM Adjustment
107
White Balance Adjustment (HI-70 Board)
107
System Control System Adjustment
108
Service Mode
109
Adjustment Remote Commander
109
Using the Adjustment Remote Commander
109
Precautions Upon Using the Adjustment Remote Commander
109
Data Process
110
Service Mode
111
Setting the Test Mode
111
Bit Value Discrimination
111
Switch Check (1)
112
Switch Check (2)
112
LED Check
112
Repair Parts List
113
Exploded Views
113
Battery Holder Assembly
113
Front Cabinet Assembly
114
Rear Cabinet Assembly
115
Lens Cabinet Assembly
116
Lens Assembly
117
Electrical Parts List
118
Sony Cyber-shot DSC-F505 Service Manual (115 pages)
DIGITAL STILL CAMERA
Brand:
Sony
| Category:
Digital Camera
| Size: 4.41 MB
Table of Contents
Table of Contents
3
Service Note
5
General
7
Disassembly
22
Attachiment of CPC-9 Jig
22
Removal of Rear Cabinet Block
23
Removal of Zoom Lens Block
23
Removal of Cabinet (LT) Block
24
Removal of Lens Block
24
Service Positionn-1 (Lens Block Area : CD-236, LD-98, PS-427 and SY-56 Boards)
24
Removal of LCD Panel Block and Control Switch Block (FK)
25
Service Positionn-2
25
Control Switch Block (FK)
25
Removal of HI-70, DD-131 Boards and Battery Holder Block
26
Removal of Upper Cabinet Block and Flash Unit (MC)
26
Service Positionn-3 (HI-70 and DD-131 Boards)
27
Removal of Front Cabinet Assembly
27
Removal and Attaciment of FP-133 Flexible Board
28
To Fold the New FP-133 Flexible Board
28
Removal of Crystal Indication Module
29
Removal of Flash Unit (ST)
29
Circuit Boards Location
30
Flexible Boards and Control Switch Block Location
30
Block Diagrams
31
Overall Block Diagram
31
Printed Wiring Boards and Schematic Diagrams
32
Frame Schematic Diagram (1)
33
Frame Schematic Diagram (2)
34
Printed Wiring Boards and Schematic Diagram
35
CCD Imager, Camera
35
Lens Drive
37
Mf Unit
39
CF/PW (Control Switch Block)
39
Lcd Drive
42
Timing Generator
43
Video
44
Audio
45
Hi Control (1/2
46
Hi Control (2/2
47
Waveforms
51
Printed Parts Location
52
Adjustments
53
Before Starting Adjustment
53
Adjusting Items When Replacing Main Parts and Boards
54
Adjustments
55
Preparations before Adjustment
55
List of Service Tools
55
Preparations
56
Discharging of the Strobe Power Supply
56
Precaution
58
Setting the Switch
58
Order of Adjustments
58
Subjects
58
Preparing the Flash Adjustment Box
59
Initialization of B, D, E, F
60
Initialization of D
60
Initializing the D
60
Modification of D
60
Initializing the B, E, F
63
Modification of B, E, F
63
Page Table
71
Video System Adjustments
73
Video Sync Level Adjustment
73
(Control Switch Block (FK) )
73
Video Burst Level Adjustment
73
Video y Level Check
73
Camera System Adjustments
74
HALL Adjustment
74
Flange Back Adjustment (Using Minipattern Box)
75
Flange Back Adjustment
75
(Using Flange Back Adjustment Chart)
76
Flange Back Check
76
Picture Frame Setting
77
F No. Standard Data Input
77
Mechanical Shutter Adjustment
77
AGC Standard Gain and Max Gain Adjustment
78
Light Level Adjustment and ND SHUTTER CHECK
78
Auto White Balance Standard Data Input
79
Auto White Balance ND Filter Compensation Adjustment
79
Auto White Balance Adjustment
80
Color Reproduction Adjustment
81
Color Reproduction Adjustment (Without ND Filter)
81
Color Reproduction Adjustment (with ND Filter)
81
Color Reproduction Check
82
White Balance Check
83
Strobe White Balance Adjustment
83
Strobe Light Level and White Balance Check
84
CCD Black Defect Compensation
84
CCD Black Defect Compensation Check
85
CCD White Defect Compensation
86
CCD White Defect Compensation Check
86
Lcd System Adjustment
87
LCD Initial Data Input
87
VCO Adjustment (Control Switch Block (FK) )
88
D Range Adjustment (Control Switch Block (FK) )
88
Bright Adjustment (Control Switch Block (FK) )
89
Contrast Adjustment (Control Switch Block (FK) )
89
Color Adjustment (Control Switch Block (FK) )
90
V-COM Level Adjustment (Control Switch Block (FK) )
90
V-COM Adjustment
91
White Balance Adjustment (HI-70 Board)
91
System Control System Adjustment
92
Service Mode
93
Adjustment Remote Commander
93
Using the Adjustment Remote Commander
93
Precautions Upon Using the Adjustment Remote Commander
93
Data Process
94
Service Mode
95
Setting the Test Mode
95
Bit Value Discrimination
95
Switch Check (1)
96
Switch Check (2)
96
LED Check
96
Repair Parts List
97
Exploded Views
97
Battery Holder Assembly
97
Front Cabinet Assembly
98
Rear Cabinet Assembly
99
Lens Cabinet Assembly
100
Lens Assembly
101
Electrical Parts List
102
Advertisement
Advertisement
Related Products
Sony DSC-F55 - Cyber-shot Digital Still Camera
Sony DSC F505V - Cybershot 2.6MP Digital Camera
Sony Cyber-shot DSC-F55V
Sony DSC-F55E
Sony DSC-F55
Sony CYBER-SHOT DSC-F717
Sony Cyber-shot DSC-F77
Sony Cyber-shot DSC-FX77
Sony DSC F828 - 8MP Digital Camera
Sony Cyber-shot DSC-W570
Sony Categories
Laptop
TV
CD Player
Camcorder
Digital Camera
More Sony Manuals
Login
Sign In
OR
Sign in with Facebook
Sign in with Google
Upload manual
Upload from disk
Upload from URL