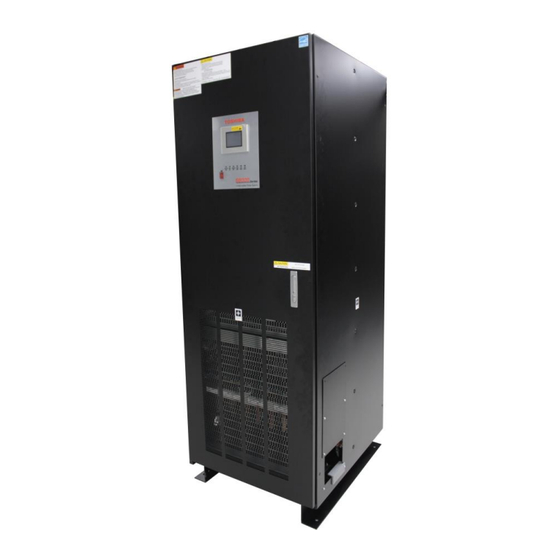
Toshiba G9000 Series Installation Manual
Sync kit
Hide thumbs
Also See for G9000 Series:
- Installation and operation manual (104 pages) ,
- Installation manual (24 pages) ,
- Manual (18 pages)
Summary of Contents for Toshiba G9000 Series
- Page 1 TOSHIBA SYNC KIT INSTALLATION MANUAL 480/480 V 100/160/225 kVA Document No: 201090-000 Document Ref: 4GBH0096 Rev. B March 2020...
- Page 3 UNINTERRUPTIBLE POWER SYSTEM If additional information or technical assistance is required call TOSHIBA Customer Support Center at 877-867-8773, or write to: Toshiba International Corporation, 13131 West Little York Road, Houston, TX 77041-9990 Attn: UPS Product Manager.
- Page 4 TOSHIBA shall not be liable for technical or editorial omissions or mistakes in this manual. Nor shall it be liable for incidental or consequential damages resulting from the use of information contained in this manual.
-
Page 5: Table Of Contents
Figure 2-1 Synchronous operation configuration ......................... 3 Figure 3-1 TOSHIBA SYNC KIT parts appearance ......................5 Figure 4-1 TOSHIBA SYNC main parts location (MASTER UPS) ..................6 Figure 4-2 TOSHIBA SYNC main parts location (SLAVE UPS) ..................7 Figure 5-1 Installation Procedure for Master UPS ........................ 8 Figure 6-1 Installation procedure for SLAVE UPS (1) ...................... - Page 6 This Page Left Intentionally Blank G9000 N Series TOSHIBA SYNC KIT 80-225kVA Installation Manual - 201090-000...
-
Page 7: How To Use This Manual
Prohibit: A prohibit symbol shows the act the user or the service personnel should NEVER perform during the UPS installation, operation or service work. PROHIBIT Safety Recommendations: If any problems are encountered while following this manual, contact the Toshiba Customer Support Center. G9000 N Series TOSHIBA SYNC KIT 80-225kVA Installation Manual - 201090-000... -
Page 8: 1.2 Qualified Personnel
Be trained in the proper care and use of protective equipment such as rubber gloves, hard hat, safety glasses, face shield, flash clothing, etc. in accordance with established practices Be trained in rendering first aid. G9000 N Series TOSHIBA SYNC KIT 80-225kVA Installation Manual - 201090-000... -
Page 9: Overview
Each TOSHIBA SYNC KIT contains all hardware necessary for one pair of master and slave UPS to operate in a synchronous configuration. Each additional UPS unit will require another sync kit, if applicable. This manual contains kit installation and startup information specifically for 80-225kVA capacity models of the G9000 Enhanced Series UPS. -
Page 10: Toshiba Sync Kit Parts List
For Fuses holder: 2x2 Screws (M4) with spring washer and flat washer For Bracket 4x2 Fuse label [Note] Part number followed by “ * ” denotes any letter A to Z. G9000 N Series TOSHIBA SYNC KIT 80-225kVA Installation Manual - 201090-000... -
Page 11: Figure 3-1 Toshiba Sync Kit Parts Appearance
#12: Screws (M3) #13: Screws (M4) #14: Fuse label [Note] Part number followed by “ * ” denotes any letter A to Z. Figure 3-1 TOSHIBA SYNC KIT parts appearance G9000 N Series TOSHIBA SYNC KIT 80-225kVA Installation Manual - 201090-000... -
Page 12: Toshiba Sync Kit Parts Location
Bracket #9: Fuses holder #10: Fuses UPGR-M*/ UPJR-C* #7: Wires (OUTPUT Busbars – Fuses) To SLAVE UPS Pictured: 225kVA UPS Figure 4-1 TOSHIBA SYNC main parts location (MASTER UPS) G9000 N Series TOSHIBA SYNC KIT 80-225kVA Installation Manual - 201090-000... -
Page 13: Figure 4-2 Toshiba Sync Main Parts Location (Slave Ups)
#2: Mounting Bracket #1: VSAU-16* Sensor Board #9: Fuses holder UPGR-M*/ #10: Fuses UPJR-C* From MASTER UPS Pictured: 225kVA UPS Figure 4-2 TOSHIBA SYNC main parts location (SLAVE UPS) G9000 N Series TOSHIBA SYNC KIT 80-225kVA Installation Manual - 201090-000... -
Page 14: Master Ups Installation Procedure
Step M-6 Step M-5 Field-installed wirings #7: Wire 3-twisted to SLAVE UPS (Bus bars - Fuse holder) From OUTPUT Busbars To SLAVE UPS Figure 5-1 Installation Procedure for Master UPS G9000 N Series TOSHIBA SYNC KIT 80-225kVA Installation Manual - 201090-000... -
Page 15: Slave Ups Installation Procedure
#12 screws. Refer to Figure 6-3 Installation procedure for SLAVE UPS (3) Step S-12. Connect the Jumper (#8) between the terminal 13 and 14 of TN1 on IO1 PCB (IOAU-09*). G9000 N Series TOSHIBA SYNC KIT 80-225kVA Installation Manual - 201090-000... -
Page 16: Figure 6-1 Installation Procedure For Slave Ups (1)
(VSAU-16* - Fuses, 3-twisted) U - U Step S-11 V - V Field-installed wirings W - W from MASTER UPS From MASTER UPS Figure 6-2 Installation procedure for SLAVE UPS (2) G9000 N Series TOSHIBA SYNC KIT 80-225kVA Installation Manual - 201090-000... -
Page 17: Figure 6-3 Installation Procedure For Slave Ups (3)
Step S-12 #8: Wire (Jumper) IO1 PCB (IOAU-09*) Figure 6-3 Installation procedure for SLAVE UPS (3) G9000 N Series TOSHIBA SYNC KIT 80-225kVA Installation Manual - 201090-000... -
Page 18: Slave Ups Setting Procedure
2. Before making a change of the “IN4” setting, make sure that the POWER DEMAND function is defunct. ATTENTION (Contact Toshiba International Corporation, if POWER DEMAND function is under service.) Step 5. Press the "CLOSE" button, and confirm that "9: ANOTHER BUS. SYNC." is lay out. -
Page 19: Figure 7-1 Slave Ups Setting Procedure
Return to "MAINTENANCE" screen Press the "INPUT PORT" button Confirm "9: ANOTHER BUS. SYNC." Confirm Press the "IN4" button Select item "9: ANOTHER BUS. SYNC." Figure 7-1 SLAVE UPS setting procedure G9000 N Series TOSHIBA SYNC KIT 80-225kVA Installation Manual - 201090-000... -
Page 20: Verify Proper Setup
Verify Proper Setup To confirm that the TOSHIBA SYNC circuit is functioning properly, during TOSHIBA SYNC operation, “Ath Bus Sync.” is displayed at the bottom of LCD screen as shown in Figure 8-1. Figure 8-1: Example of TOSHIBA SYNC operation display... - Page 22 SOCIAL INFRASTRUCTURE SYSTEMS GROUP POWER ELECTRONICS DIVISION 13131 West Little York Rd., Houston, TX 77041 Tel: 855-803-7087 Fax 713-896-5212 US 800/231-1412 Canada 800/872-2192 Mexico 01/800/527-1204 www.toshibaups.com Printed in Japan...


