Sign In
Upload
Manuals
Brands
Sony Manuals
Camcorder
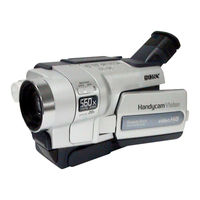
Handycam Vision CCD-TRV118
Sony Handycam Vision CCD-TRV118 Manuals
Manuals and User Guides for Sony Handycam Vision CCD-TRV118. We have
1
Sony Handycam Vision CCD-TRV118 manual available for free PDF download: Service Manual
Sony Handycam Vision CCD-TRV118 Service Manual (378 pages)
Hi8 Video Camera Recorder
Brand:
Sony
| Category:
Camcorder
| Size: 25.65 MB
Table of Contents
Table of Contents
5
1 Service Note
6
Power Supply During Repairs
6
Lcd Type Check
7
Self-Diagnosis Function ···················································
8
Connection of Equipment
11
Video Light
12
Lcd Module
14
Battery Panel Block Assembly
26
Service Position to Check the Mechanism Deck
31
Flexible Boards Location
34
3 Block Diagrams
36
Schematic Diagrams
46
Control Switch Block
65
4 Printed Wiring Boards
66
VC-303 ··········································································
69
Pd-180 ···········································································
71
Si-035 ············································································
73
Ls-057 (S/T Reel Sensor), Fp-228
74
Waveforms ·····································································
75
Mounted Parts Location
82
5 Repair Parts List
84
Exploded Views
86
Electrical Parts List
98
Operating Instructions
110
Declaration of Conformity
111
Main Features
113
Table of Contents
115
Checking Supplied Accessories
118
Connecting the Power Cord
119
Inserting a Cassette
119
Recording on a Tape
119
Getting Started
123
Using this Manual
123
Precautions on Camcorder Care
126
Step 1 Preparing the Power Supply
127
Installing the Battery Pack
127
Charging the Battery Pack
128
Charging Time
130
Recording Time
131
Playing Time
132
Connecting to a Wall Outlet
133
Step 2 Setting the Date and Time
135
To Check the Preset Date and Time
136
Step 3 Inserting a Cassette
137
Recording - Basics
139
Recording a Picture
139
Adjusting the Lcd Screen
141
Adjusting the Brightness of the Lcd Screen
142
Using the Zoom Feature
143
Shooting with the Mirror Mode
144
Shooting a Backlit Subject - BACK LIGHT
147
Color Slow Shutter
148
Nightshot
148
Shooting in the Dark
148
Super Nightshot
148
Using Color Slow Shutter
149
Self-Timer Recording
150
Superimposing the Date and Time on Pictures
151
End Search
152
Rec Review
152
Checking Recordings - END SEARCH - EDITSEARCH - Rec Review
153
Playback - Basics
154
Playing Back a Tape
154
To Display the Screen Indicators - Display Function
156
Various Playback Modes
158
Viewing Recordings on TV
160
If Your Tv Is Already Connected to a Vcr
161
If Your Tv or Vcr Is a Monaural Type
161
Advanced Recording Operations
162
Recording Still Images on a "Memory Stick" While Recording on a Tape
162
Recording Still Images on a Tape - Tape Photo Recording
165
Using the Wide Mode
167
To Cancel the Wide Mode
169
Using the Fader Function
170
Using Special Effects - Picture Effect
173
Using Special Effects - Digital Effect
174
Using the PROGRAM AE Function
177
Adjusting the Exposure Manually
179
Focusing Manually
180
Interval Recording
181
Frame by Frame Recording - Frame Recording
183
Superimposing a Title
184
Making Your Own Titles
186
To Change a Title You Have Stored
187
Using the Built-In Light
188
Replacing the Bulb
190
Inserting a Scene
191
Advanced Playback Operations
192
Playing Back a Tape with Picture Effects
192
Playing Back a Tape with Digital Effects
194
Enlarging Recorded Images - Tape PB ZOOM
196
Quickly Locating a Scene - ZERO SET MEMORY
198
Searching for a Recording by Date
199
Date Search
199
Searching for a Photo - PHOTO SEARCH/PHOTO SCAN
201
Scanning Photo
202
Editing
203
Dubbing a Tape
203
Dubbing a Tape Easily - Easy Dubbing
207
Setting the Ir Setup Code
209
Dubbing Only Desired Scenes - Digital Program Editing (on Tapes)
215
Recording Video or TV Programs
228
Inserting a Scene from a VCR - Insert Editing
232
Memory Stick" Operations
235
Using a "Memory Stick" - Introduction
235
Selecting the Still Image Quality Mode
237
Image Quality Settings
238
Selecting the Moving Picture Size
239
Recording Still Images on a "Memory Stick" - Memory Photo Recording
241
Self-Timer Memory Photo Recording
244
Recording Images from a Tape as Still Images
245
Recording a Still Image from External Equipment
247
Superimposing a Still Image in the "Memory Stick" on an Image - MEMORY MIX
249
Recording Superimposed Images on a Tape
250
Recording Moving Pictures on a "Memory Stick" - MPEG Movie Recording
255
Self-Timer Mpeg Movie Recording
258
Recording Pictures from a Tape as a Moving Picture
259
To Stop Recording
259
Recording a Moving Picture from External Equipment
261
Interval Still Image Recording
263
Recording Edited Pictures as a Moving Picture - Digital Program Editing (on a "Memory Stick")
265
Erasing the Program You Have Set
266
Erasing All Programs
267
Setting up a Folder
269
Viewing Still Images - Memory Photo Playback
272
Viewing Moving Pictures - MPEG Movie Playback
275
Playing Back a Moving Picture from the Desired Part
276
Selecting a Folder to View
278
Copying Images Recorded on a "Memory Stick" to a Tape
279
Enlarging Still Images Recorded on a "Memory Stick" - Memory PB ZOOM
281
Playing Back Images Continuously - SLIDE SHOW
283
To Cancel the Slide Show
283
Preventing Accidental Erasure - Image Protection
285
Deleting Images - DELETE
286
Deleting All Images
287
Writing a Print Mark - PRINT MARK
289
Viewing Images on Your Computer - Introduction
291
Viewing Images Recorded on a "Memory Stick
294
Connecting Your Camcorder to Your Computer Using the USB Cable
296
System Requirements
296
Installing the Usb Driver
298
Installing Image Transfer
299
Installing Imagemixer
300
If You Cannot Install the Usb Driver
303
Viewing Pictures Recorded on a Tape
306
Viewing Images Recorded on a "Memory Stick" on Your Computer
311
Connecting Your Camcorder to Your Computer Using the USB Cable
314
Viewing Images Recorded on a "Memory Stick" on Your Computer
316
Capturing Images from an Analog Video Unit on Your Computer - Signal Convert Function
317
Customizing Your Camcorder
319
Changing the Menu Settings
319
Troubleshooting
333
Types of Trouble and How to Correct Trouble
333
Self-Diagnosis Display
341
Warning Indicators and Messages
342
Additional Information
346
About Video Cassette
346
About the "Memory Stick
349
About the "Infolithium" Battery Pack
351
Effective Use of the Battery Pack
351
Battery Life
352
About I.link
353
Using Your Camcorder Abroad
355
Simple Setting of Clock by Time Difference
355
Maintenance Information and Precautions
356
Moisture Condensation
356
Cleaning the Video Heads
357
About Care and Storage of the Lens
360
Specifications
362
Quick Reference
365
Identifying Parts and Controls
365
Remote Commander
373
Index
376
Revision History
378
Advertisement
Advertisement
Related Products
Sony Handycam Vision CCD-TRV12
Sony Handycam Vision CCD-TRV67
Sony Handycam Vision CCD-TRV87
Sony Handycam Vision CCD-TRV65E
Sony Handycam Vision CCD-TRV715
Sony Handycam Vision CCD-TRV815
Sony Handycam Vision DCR-TRV7
Sony Handycam Vision CCD-TRV318
Sony Handycam Vision CCD-TRV58
Sony Handycam Vision video Hi8 XR CCD-TRV715
Sony Categories
Laptop
TV
CD Player
Camcorder
Digital Camera
More Sony Manuals
Login
Sign In
OR
Sign in with Facebook
Sign in with Google
Upload manual
Upload from disk
Upload from URL