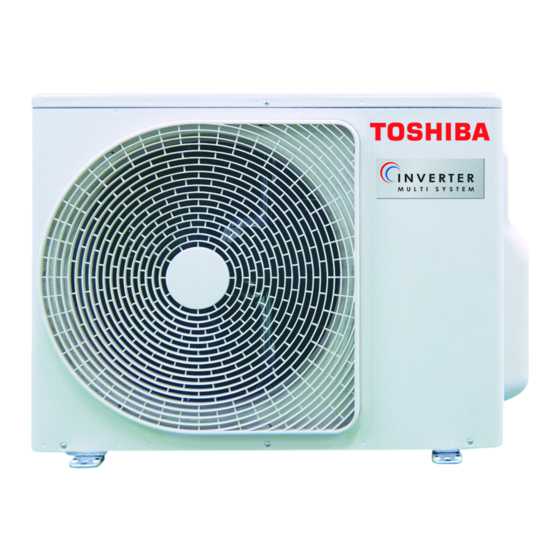
Summary of Contents for Toshiba RAS-2M10G3AVG-E
- Page 1 AIR CONDITIONER (MULTI-SPLIT TYPE) Installation Manual Outdoor Unit Model name: RAS-2M10G3AVG-E RAS-2M14G3AVG-E Installation Manual English Outdoor Unit...
-
Page 2: Table Of Contents
Outdoor Unit Installation Manual Contents Precautions for safety ................... 2 Installation / service tools . -
Page 3: Precautions For Safety
Outdoor Unit Installation Manual Precautions for safety The manufacturer shall not assume any liability for the damage caused by not observing the description of this manual. Be sure to read this installation manual carefully before installing. The supplied CD-ROM contains the installation manual translated into many languages. Recommend to the owner to perform maintenance periodically when using over long periods of time. - Page 4 Outdoor Unit Installation Manual Be sure to follow the precautions provided here to avoid safety risks. The symbols and their meanings are shown below. It indicates that incorrect use of this unit can result in a high possibility of DANGER severe injury(*1) or death.
- Page 5 Outdoor Unit Installation Manual CAUTION AS WELL AS THE ADOPTION OF THIS NEW REFRIGERANT, REFRIGERATING MACHINE OIL HAS ALSO BEEN CHANGED. THEREFORE, DURING INSTALLATION WORK, BE SURE THAT WATER, DUST, FORMER REFRIGERANT, OR REFRIGERATING MACHINE OIL DOES NOT ENTER THE REFRIGERATION CYCLE OF A NEW- REFRIGERANT AIR CONDITIONER.
- Page 6 Outdoor Unit Installation Manual DANGER • IN THE EVENT THAT THE REFRIGERANT GAS LEAKS OUT OF THE PIPE DURING THE INSTALLATION WORK, IMMEDIATELY LET FRESH AIR INTO THE ROOM. IF THE REFRIGERANT GAS IS HEATED BY FIRE OR SOMETHING ELSE, IT CAUSES GENERATION OF POISONOUS GAS.
- Page 7 Outdoor Unit Installation Manual WARNING • Speci ed tools and pipe parts for model R32 are required, and installation work must be done in accordance with the manual. HFC type refrigerant R32 has 1.6 Times more pressure than that of conventional refrigerant (R22). Use the speci ed pipe parts, and ensure correct installation, otherwise damage and/or injury may be caused.
- Page 8 Outdoor Unit Installation Manual WARNING • The installation of pipe work shall be kept to a minimum. • The following must be certainly done during pump down. • Do not incorporate air into the refrigeration cycle. • Close the 2 service valves. Stop the compressor and remove the refrigerant pipe. If the refrigerant pipe is removed when the compressor is operating and service valves are opened, the refrigerant cycle will inhale unwanted matter such as air and the pressure in the cycle becomes abnormally elevated.
- Page 9 Outdoor Unit Installation Manual CAUTION • Please read this installation manual carefully before installing the unit. It contains further important instructions for proper installation. • Exposure of unit to water or other moisture before installation could result in electric shock. Do not store it in a wet basement or expose to rain or water. •...
-
Page 10: Installation / Service Tools
05 or 07 or 10 or 13 6.35, 9.52 mm 6.35, 9.52 mm Unit A 05 or 07 or 10 or 13 6.35, 9.52 mm 6.35, 9.52 mm 20 (RAS-2M10G3AVG-E) Total — 26 (RAS-2M14G3AVG-E) Installation parts, accessories Installation parts *Locally procured y t ’... -
Page 11: Installation Of Outdoor Unit
Outdoor Unit Installation Manual Draining Off the Water from the Outdoor Unit Installation of outdoor unit Install 2 waterproof rubber caps and the drain nipple to drain off the Installation Location water from the outdoor unit. Seal the knock-out holes and screw/thread areas tightly using a silicon A place which can bear the weight of the outdoor unit and does not cause adhesive or a caulking compound. -
Page 12: Refrigerant Piping
Outdoor Unit Installation Manual Pipe connection Refrigerant piping 1. Make wire and pipe connections for each indoor unit separately. 2. Align the centres of the connecting pipes and tighten the fl are nut as much CAUTION as possible with your fi ngers, then tighten the nut using a torque wrench. Be sure to tighten the nut at the specifi ed torque value. -
Page 13: Electrical Work
Outdoor Unit Installation Manual Performing Additional Installation of an Indoor Unit 4. Disconnect the charge hose from the service port, then open the valve stem fully using a 4 mm hexagon wrench. 1. Collect refrigerant from the outdoor unit. 2. Turn off the circuit breaker. Service port cap Hexagon wrench is 3. -
Page 14: Grounding
(called an inverter) in the outdoor unit. If the air conditioner is not grounded, users may receive an electric shock Model RAS-2M10G3AVG-E RAS-2M14G3AVG-E if they touch the surface of the outdoor unit and that unit is charged with static. - Page 15 Outdoor Unit Installation Manual Gas Leak Inspection 3. Turn on the circuit breaker to supply electricity. In the initial LED display status, D805 is lighted as below. Refer to the “ Gas Leak Inspection” on page 12. : ON, : OFF, : Rapid Flashing (5 times/sec.), : Slow Flashing (1 time/sec.) Test run...
-
Page 16: Pump-Down Operation
Outdoor Unit Installation Manual 4. Hold down SW01 for at least 5 seconds, and check that D800 is lighted Pump-down Operation and D804 light is fl ashing (1 time/sec.). Pump-down Operation (Recovering refrigerant) D800 D801 D802 D803 D804 D805 CAUTION 5. -
Page 17: Appendix
Outdoor Unit Installation Manual... - Page 18 144 / 9 Moo 5, Bangkadi Industrial Park, Tivanon Road, Tambol Bangkadi, Amphur Muang, Pathumthani 12000, Thailand 1116491099...


